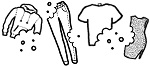

Accidents with our garments happen, a loose drawstring, a broken zip, or a ripped seam, but no need to throw away your clothes or spend a lot of money with a professional. Instead, we will show you some tricks to help you fix your garment from home.
FIX A RIPPED SEAM
You’ll need the following:
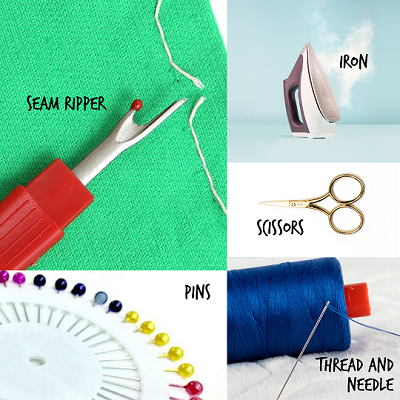
- Seam ripper
- Scissors
- Pins
- Needle
- Thread
- Iron
- To start, take a closer look at your garment. Inspect it from the inside out to see where the ripped part starts and where it ends.
- If you see any loose stitch from the ripped seam, remove it by guiding the sharp end of your seam ripper under a stitch and pulling it upward. Be gentle!
- You can also tie any loose threads near each other by tying them together in a knot. Use your scissors to cut right above the knot.
- Before sewing, keep everything together by pinning the pieces of fabric together right where the seam has ripped.
- Let’s start sewing! Thread your needle by knotting the end of the thread and snipping the extra thread under with your scissors. We recommend you use a thread with the same color as your garment.
- Insert your needle into the fabric about ½” before the beginning of the ripped seam. Use a straight stitch of backstitch to sew another seam.
- Take small stitches in and out of both layers of fabric along the ripped seam. You’ll see that at first, you’ll be sewing over an existing stitch, and that’s ok! This will help you secure the new seam. Follow along where the stitches used to be. Try not to make too long stitches, or else the hole of the seam will still be visible.
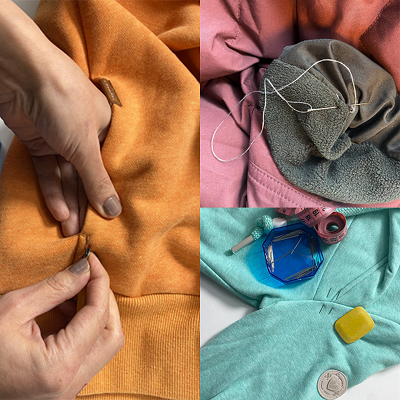
- When you reach the end of the ripped seam, continue making stitches about ½” into the existing seam to secure it. Knot the thread and snip off the extra thread once you finish.
- Check your garment inside out if you see any missing spots or if it doesn’t look secure. You can make additional backstitches until you are happy with the result.
- Finally, iron your garment, focusing where the ripped seam is, and you are done!
DON’T THROW AWAY YOUR JACKET!
If you find that your zipper separates, you can replace the slider easily by following these steps:
You will need:
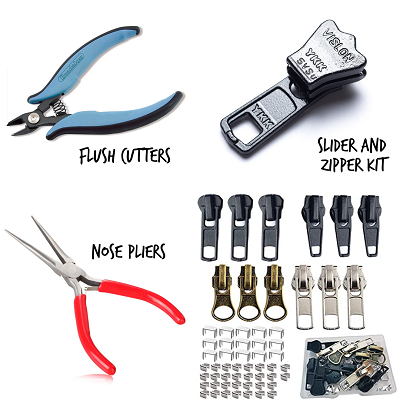
- Flush cutters and nose pliers - you can find them at any hardware store.
- Slider and zipper kit.
- First, unzip your jacket and remove the top stop only on the side of the zipper with the slider. Then, remove it gently with the nose pliers. Leave the teeth and fabric intact.
- Move the slider to the top of the zipper and gently pop it off the zipper track.
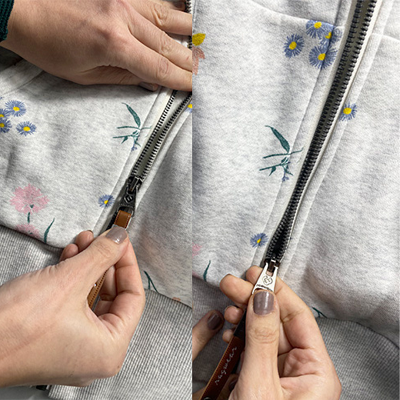
- Put the new slider by wiggling it at an angle to avoid any issues with the fabric. Once you zip it up and down check if it works.
- To add the new top stop, use your nose pliers by pressing them firmly to close the small u-shaped metal piece on the edge of the zipper tape.
MISSING A DRAWSTRING? USE A PAPER CLIP!
Here’s a little trick if you pull your drawstring off your hood.
- Using nose pliers, put a small hook on the end of a paper clip.
- Bunch up the fabric and slide it into the hoodie.
- Slide the paper clip until it’s about an inch past the end of the drawstring.
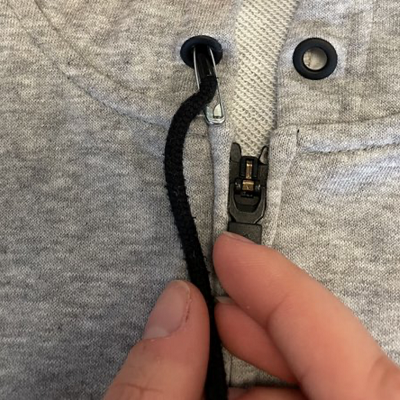
- Rotate the paper clip a few times to grab the drawstring and carefully slide the paper clip at the end of the drawstring.
- Once both ends are out, tie a knot to ensure this won’t happen again.
We hope these tricks help you keep your clothes by your side for much, much longer!
With love,
ragwear, the first in vegan streetwear.