
Repairing Clothes at Home – Easy Tricks for Jackets, Drawstrings & Seams
Quick fixes to get your favourite pieces back in shape – no sewing pro needed.
Fix Your Clothes Yourself – Sustainable & Simple
Small flaws in your clothes aren’t a reason to throw them away! With a few simple tricks, you can repair your jacket, hoodie or shirt at home – no sewing machine required. Just a little patience and the right techniques. We’ll show you how to mend a torn seam, get a stuck zipper working again or rethread a missing drawstring.
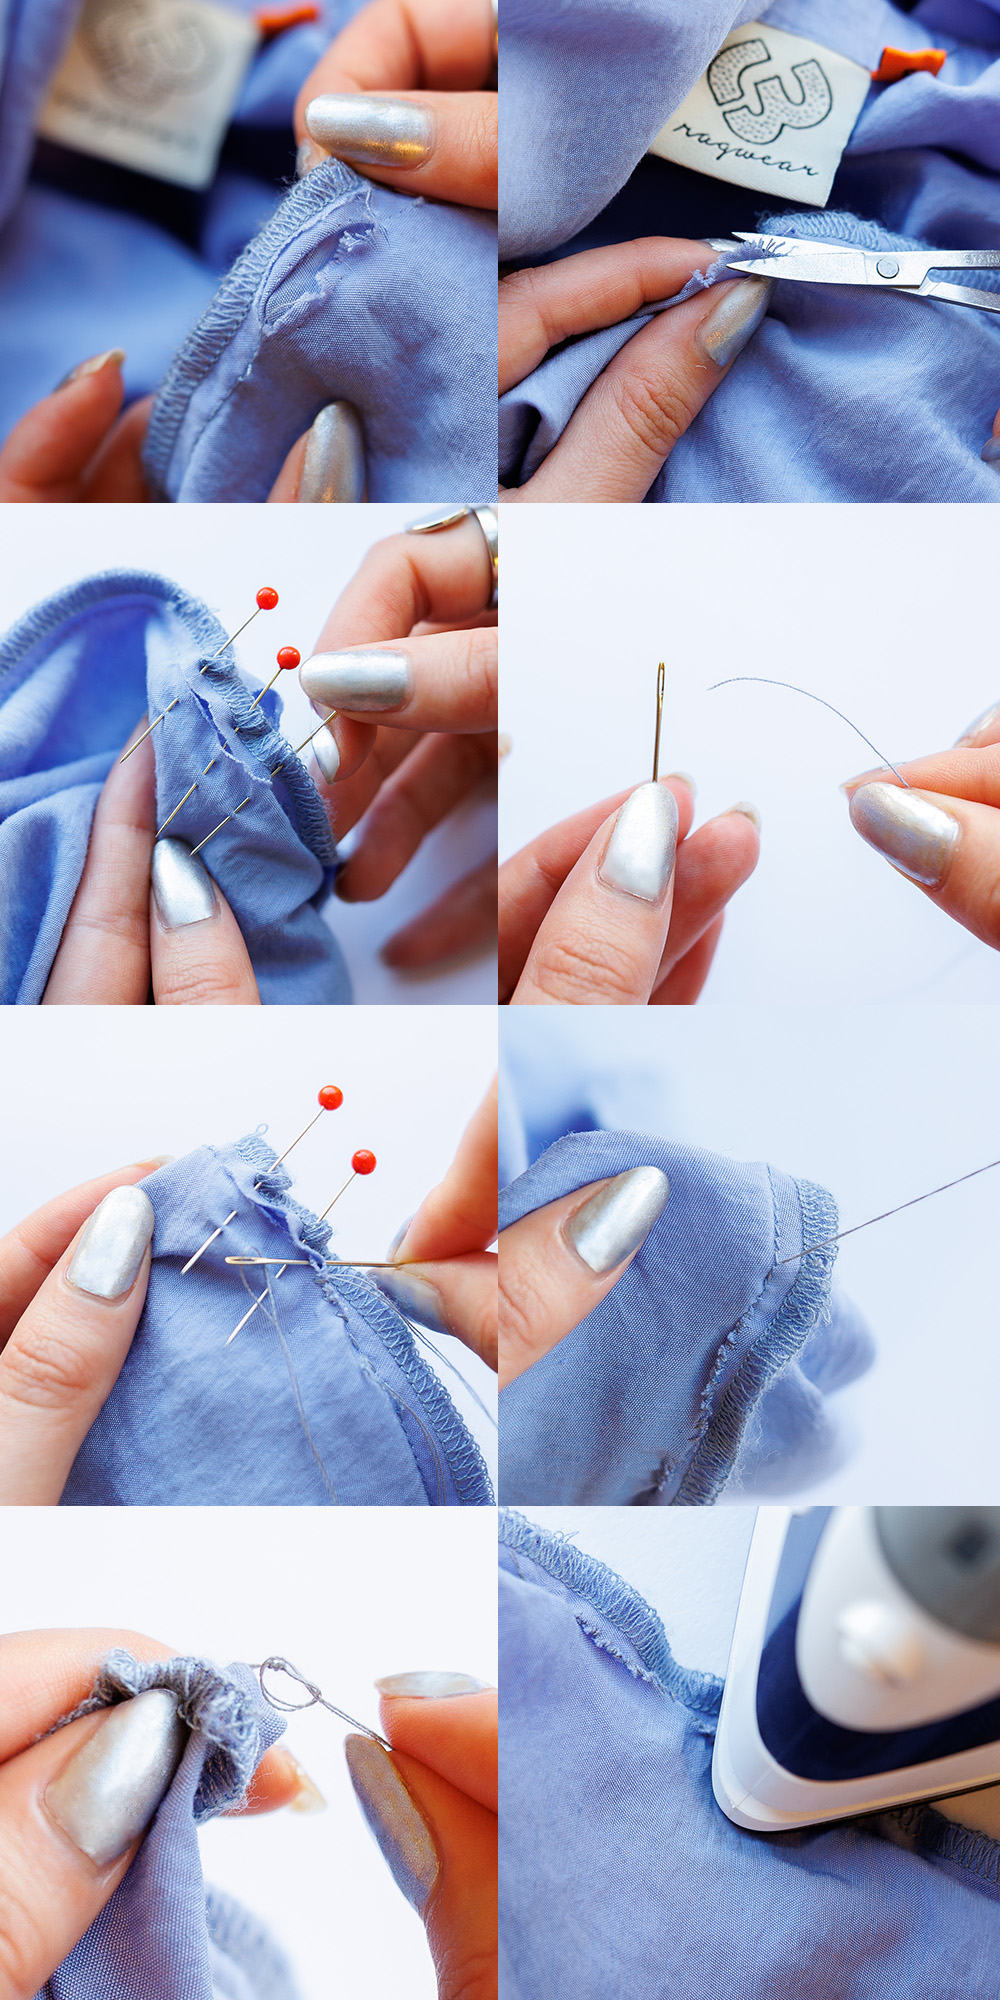
Repairing a Seam – Step-by-Step Guide
You’ll need:
- Seam ripper or small scissors
- Pins
- Needle & matching thread
- Iron

Here’s what to do:
- Inspect the seam: Turn your garment inside out and identify where the tear starts and ends.
- Remove loose threads: Use scissors or a seam ripper to gently clean up frayed threads.
- Pin the fabric: Align the fabric edges along the original seam and pin them together.
- Thread your needle: Choose matching thread, thread the needle, and tie a knot at the end.
- Start sewing: Begin about 1 cm before the tear and sew small, even stitches along the original seam line.
- Secure the stitches: Stitch a bit beyond the end of the tear to hold everything in place.
- Finish off: Tie a double knot and cut off excess thread.
- Pro tip: Gently iron the repaired seam to flatten and neaten it.
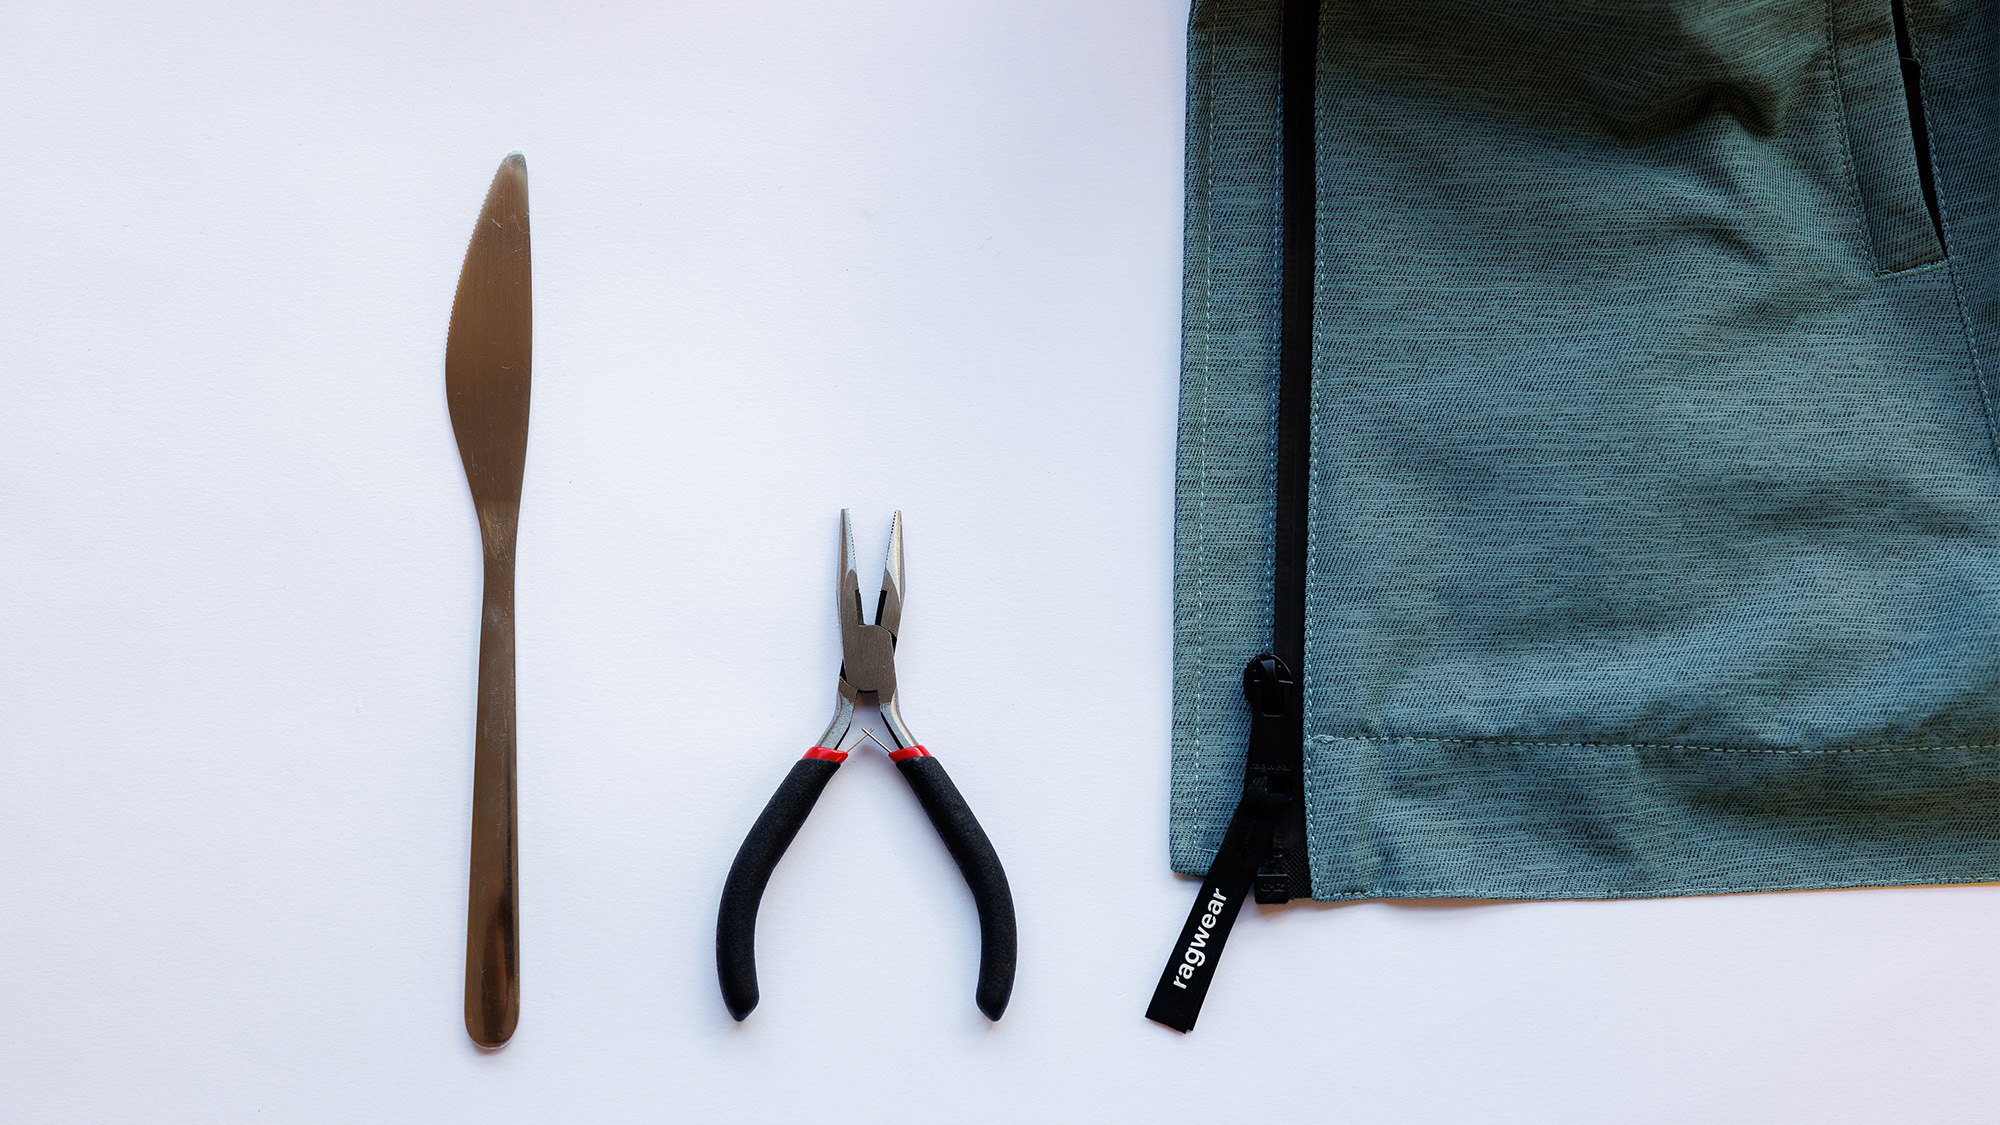
Fixing a Zipper – No Replacement Needed
You’ll need:
- Needle-nose pliers
- Small knife
- Optional: zipper repair kit
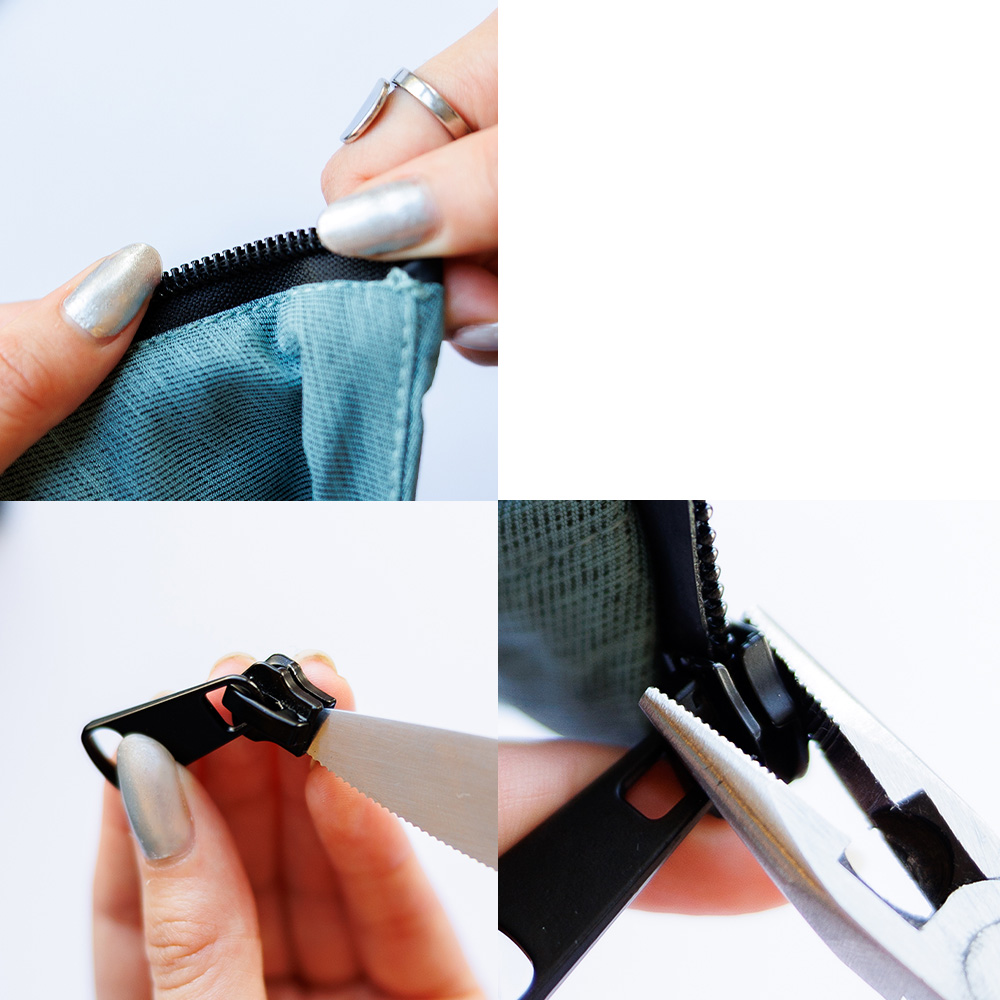
If the zipper is stuck:
- Check the teeth: Make sure all teeth are intact and clean the area.
- Tighten the slider: Use pliers to gently squeeze the flat sides of the slider – this often improves grip.
- Test it: Try zipping it up again to see if it works.
If the slider has come off:
- Open the slider: Carefully use a knife to pry the slider open slightly.
- Slide it back on: Guide it back onto the zipper teeth and squeeze it closed with the pliers.
- Last resort: If nothing works, try a zipper repair kit – you can find these online with simple instructions.
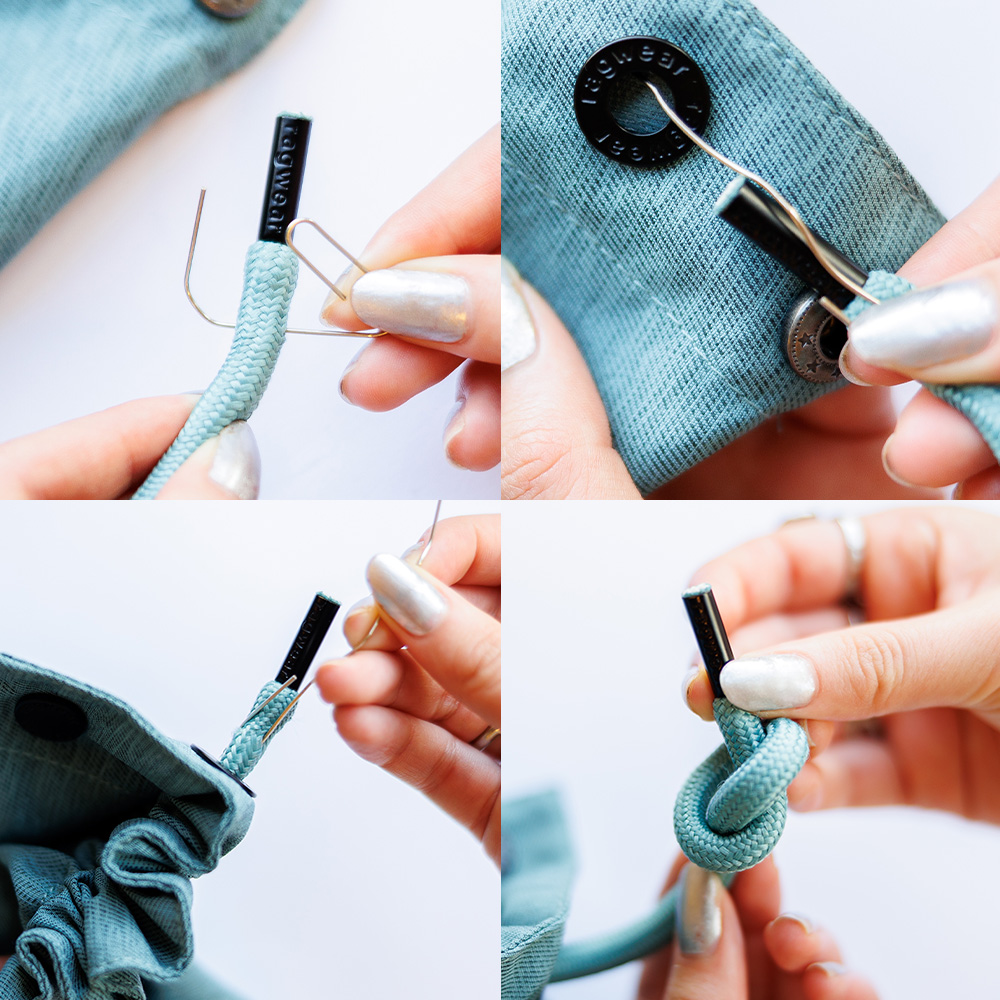
Rethreading a Drawstring – The Paperclip Trick
Here’s how to get it back:
- Attach a paperclip: Insert a large paperclip about 2 cm from the end of the drawstring and fasten it.
- Feed it through: Push the paperclip into the tunnel and work it through the fabric channel step by step.
- Finish it off: Once it’s out the other end, tie a knot at both ends of the drawstring so it stays put.
Repairing Your Clothes Is Worth It – For You and the Planet
By fixing your clothes instead of tossing them, you save money and make a sustainable choice. You reduce waste, extend the life of your favourite pieces and help combat throwaway fashion.
Bonus tip: Want to learn how to properly care for your jacket so you don’t have to repair it in the first place? Check out our guide: “How to care for your ragwear jacket”